
First Attempt at Casting
| Silver Bullet Pages | |
|---|---|
|
|
|
Hot Lead
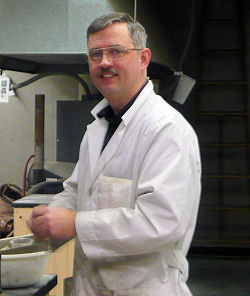
I was going to try to bodge things together with a couple of crucibles and some acetylene torches, in true redneck style. However, it had become obvious that, if this was going to work, I was going to need access to better facilities than my kitchen counter. I spoke with Dr. Kevin Jaansalu, a professor in the Metallurgy department of Montana Tech, and he's graciously agreed to help further this particular bit of lunacy.
Prior to speaking with Dr. Jaansalu, I had done some reading on commercial silver casting, and had decided that a graphite mold would be required to prevent the molten silver from oxidizing on contact with the mold. I had contacted NEI Handtools Inc. about building a graphite mold, which presents a whole set of challenges and obstacles in itself. Dr. Jaansalu suggested that, with the proper treatment, we could probably use a steel mold. This was great news. Bullet mold makers are accustomed to working with steel, while most have them have never tried machining graphite. Working in steel offers huge savings in both money and frustration. Also, steel molds are considerably more durable than graphite, which means it's less likely I'll break them during casting. Finally, when I wrote to NEI saying I was going to hold off on making a graphite mold, they very generously sent me a beautiful steel mold to play with. Thanks guys!
So today (Feb 22) I showed up in the Metallurgy labs, ready for our first attempt at casting silver bullets. The mold NEI sent me is in .45 caliber, and the bullets it casts are huge. However, we're not trying to get functional bullets yet. After all, we've calculated that the silver bullets out of a standard mold will be undersized. Our goal is to see if we can cast silver in a steel mold, and to determine how much smaller the silver bullets are than lead bullets cast from the same mold.
Lead Bullets
When I arrived, Dr. Jaansalu had already started setting up equipment. We warmed the mold up to about 100°C and set up a bunsen burner to melt the lead. Things went smoothly, and in short order we had molten lead and a hot mold. We assembled the mold, and held it together with a set of vice-grips, then poured the molten lead in. Given my virtually complete lack of experience with casting bullets, it worked surprisingly well. My pours were a little slow, resulting in some slight surface wrinkling in the bullets, but overall they looked pretty good. We cast four bullets, and called it good enough.
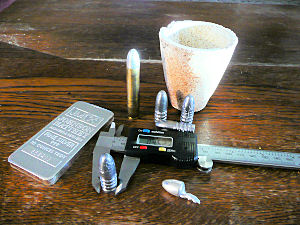
Here's the lead bullets. Not bad, huh? The average diameter at the base is about .453 inches, and they're reasonably consistent. These bullets are huge - a bit over 500 grains each. Having cast some functional lead bullets, we turned our attention to the task of casting silver in the same mold.
Silver Bullets
First we had to address the issue of preventing the silver from reacting with the steel mold. Remember, I was originally going to have the mold machined from graphite to prevent this problem. Dr. Jaansalu had originally suggested several complex mold-release agents, but he had a stroke of genius today. He suggested that we coat the interior of the mold with a very thin layer of carbon. I thought this sounded like a fine idea, but wasn't sure how we could achieve such a thing. Given my background, when someone says "thin layers" I start thinking about esoteric vacuum deposition chambers, which don't grow on trees. However, there is an easier way to apply a thin layer of carbon to a surface. The good doctor fired up a Bunsen burner, then shut down the oxygen supply. The result, naturally, was a fat yellow flame emitting lots of sooty . . . carbon. The mold sections were passed through the flame a few times, resulting in a nice, even (or at least even enough for our purposes) coating of carbon. This was cheaper than the vacuum chamber, and much faster! The question is, will this low tech approach work well enough to keep the cast bullets nice and shiny?
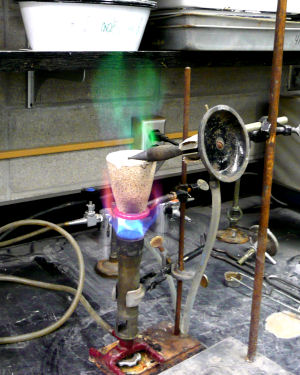
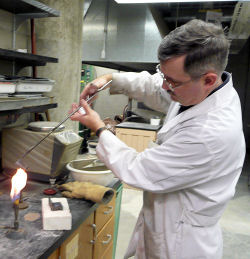
Then we tried to melt the silver. Given it's high melting point, we were also concerned about oxidation. Dr. Jaansalu also informed me that molten silver has a tendency to absorb air, which not only hardens the metal but may cause it to spit, pop, and splatter when pouring. Getting splattered with molten silver doesn't sound like much fun. Rather than using a flux, he suggests that we rig a second Bunsen burner to create a reducing environment. I was delighted to have someone more knowledgable than myself making such decisions. The apparatus was very pretty. The main burner gave off the traditional bright blue flame, which turned magenta as it lapped around the ring stand and crucible. The brass diffuser of the upper burner gave its flame a bright green color. Overall, it looked like some fantastic olympic torch. With two burners running wide open, we placed five ounces of silver bullion in the cruicible, and waited. And waited. And waited. Despite it's considerable aesthetic appeal, this apparatus was unable to get hot enough to actually melt the silver.
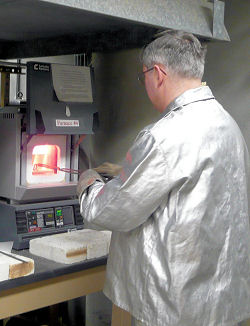
Plan "B" was to use a muffler furnace to melt the silver. We fired up the furnace, and went out for lunch while it warmed up. After lunch, we came back to a cold furnace -- the thermal alarm had tripped, and shut the unit down. After re-setting the alarm, we turned it up, and added the silver crucible. We also added a second crucible containing several graphite sticks, with the idea that the graphite would react with any free oxygen, preventing it from oxidizing the silver. We put the mold in a second furnace, and set it to 250°C, (482°F), trying to approximate the maximum temperature you might get by heating the mold in a kitchen oven. Ideally, the mold should be a bit hotter, but we're trying to avoid using too much equipment that Mercy couldn't improvise easily.
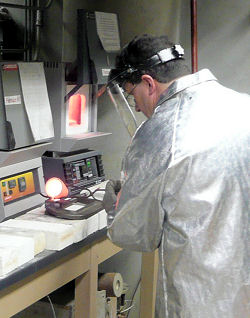
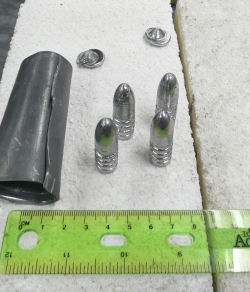
Finally, the moment of truth. We pulled the hot mold onto the refractory brick, and used a huge C-clamp to hold it tightly together. I pulled the crucible containing the molten silver, glowing a violent orange, and poured our first silver bullets. OK, I tried to pour silver bullets. The silver hardened on the sprue plate, and I was unable to actually fill the mold with silver. We heated up the silver, and tried again, with exactly the same results. Either the mold or the silver needs to be heated up more. We were very close to a successful cast. Sadly, our time was running out, and we decided to try it again next week. The results of our efforts: two partial silver bullets. Hoever, there is some good news. The carbon coating worked like a charm -- both bullets were bright and shiny, with no evidence of oxidation. The silver pour was smooth as glass, no spitting, popping or other nasty behaviors. If the silver had actually filled the mold it would have been a perfect pour.
In the end, we failed to produce a pretty silver bullet, but it was a near thing. Tune in next week as the quest for the silver bullet heats up. Literally!
Next: A Taste of Success